
Thursday, July 27, 2006
Replacing a Volkswagen New Beetle fog light lens in three easy steps
Edit: this post seems to be fairly popular with people looking for info on replacing these Volkswagen New Beetle fog lights and headlights. I have become an accidental specialist on the subject, so if you have any questions or suggestions, please comment or email me. As a bonus, here's a VWvortex thread on the subject of removing the front bodywork.
When we bought the New Beetle about a year ago, the driver's side fog lamp had a cracked lens:
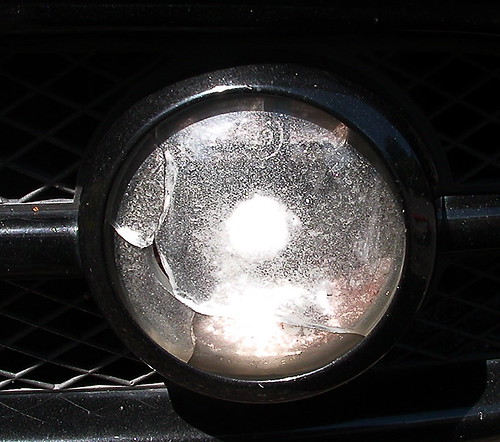
For her birthday, The Lovely One wished for it to be replaced with a new lens. Therein lies a tale.
Step 1: remove front wheels and headlights
The lens is not available separately from the entire fog lamp assembly. It's a small unit that sits in the low-mounted grille, under the bumper. The bulb is easily changed with no difficulty, but the assembly is attached to the grille with three Phillips-head screws.
The New Beetle is a tightly packaged car. In various places around the vehicle, you'll find packaging decisions that to my mind indicate either an engineering team that surrendered to the constraints of squeezing everything into this car's odd shapes and spaces, or one that was simply rushed by a rather quick development schedule. It cannot have helped that the New Beetle is an adaptation of the VW Golf platform, which means that the car is in some ways an attempt to put a round shape over a formerly boxy car.
The two screws on on the top side of the light are blocked by the bumper structure: they cannot be accessed from above. I don't think they can be accessed from the back, either. Let us consult Mr. Haynes: hm. All we have to do is remove the front clip to access those screws. What is this front clip they speak of?
Step 2: unplug turn signal and fog light connectors, then remove front clip
It's every piece of bodywork in front of the windshield, except for the hood. And the hood will block some of the screws, too.
A quick web search confirms that indeed, that's the normal procedure on a 1998 New Beetle. The standard Volkswagen shop schedule is 3 hours for this job.
Technically, only the bumper cover (which on the Beetle is a single piece of plastic bodywork covering the entire nose of the car: everything below the hood and between the fenders) needs to be removed, but it is attached to the two fenders by screws that are nearly as blocked as the fog lamp screws. With some patience and a few special tools, you might be able to release it without removing the fenders, but I wouldn't bet on it, and the Haynes manual doesn't recommend it.
Getting to all of the bolts holding the fenders in place requires you to first remove the front wheel, and then the inner fender liner, another piece of plastic held on by about ten screws.
With the fender liner removed, you can get some idea of what I meant by tightly packaged:
This is the area in the front left corner of the car, just below the headlight.
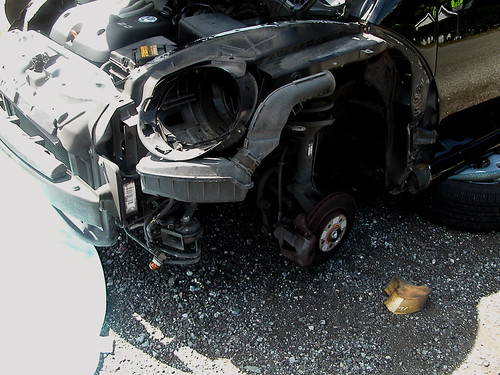
Another view. Volkswagen has managed to tuck the fresh air intake, the horns, and some coils of rigid hydraulic tubing (brake lines? Oil lines?) into this corner of the car.
 Once you remove the screws and bolts attaching the fender from the inside of the fenderwell (and don't forget the piece of load-bearing foam rubber tucked inside the fender) you get to deal with this little row of screws on the top side. You're not out of the woods yet, oh no: one or two of those screws near the windshield will be inaccessible via a normal screwdriver because the hood blocks the way. This is one of the places I had to switch to a bit held in a 1/4" socket in my ratchet driver, but at one point that was too tall, and I had to use a bit held in the jaws of my adjustable wrench. That was just stupid. Pay no attention to the warning on the battery cover, by the way: that's just the dealership trying to scare you away from plugging into the OBD-II/VAG-COM port or something.
Don't forget to remove the headlights, too. And you have to do this whole procedure (wheels, fender liners, headlights, fender bolts) on both sides of the car.
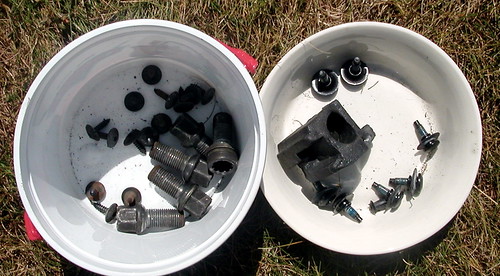
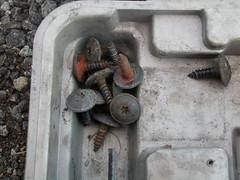
This is a little bit less than all the bolts from one side of the car. So the total number of bolts removed and replaced was about twice this. My little Skil driver (thanks, Mom & Dad!) held up through it all. Good tool.
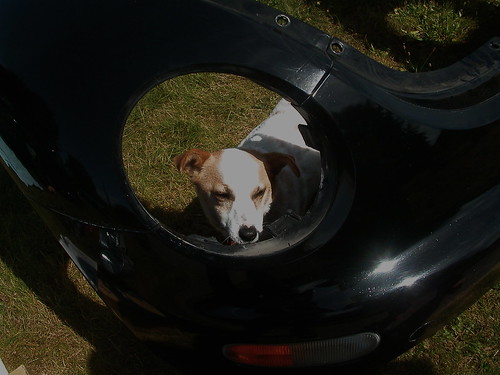
With TLO's help, the front clip was gently removed, allowing for the kind of spontaneous cute-dog shot you only get one chance to take:
Step 3: undo three screws holding old fog lamp assembly to grille, replace with new one
See? It's easy!
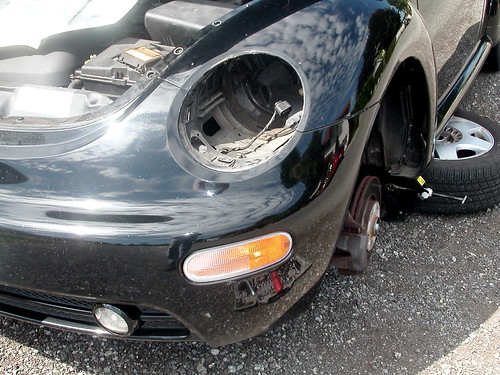
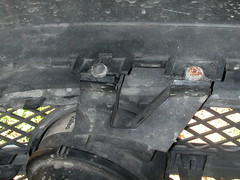
Here's a shot of where the fog light was:
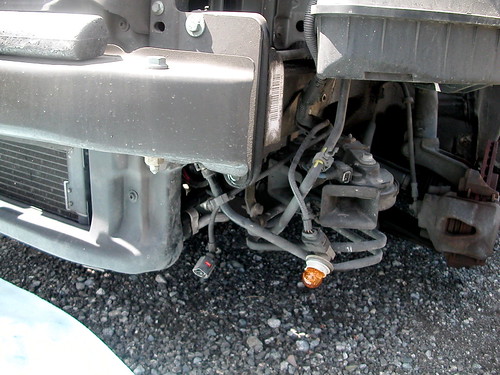
I've put some notes on the flickr photo that might give you an idea of what's going on here.
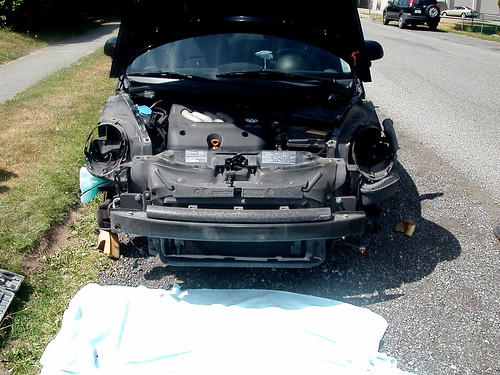
At this point, you have a new fog light in the right place in the grille, and your car looks like this:
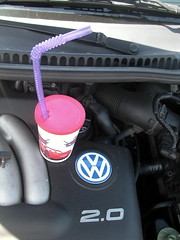 Time for a much-needed drink break. Because, you know, this is the halfway point of the job.
As the saying goes, installation is the reverse of removal. There were some exciting moments while I tried to reinstall the passenger-side headlight, but I think I broke much less structural plastic on this project than I usually break.
And thanks to this repair running on so long, I got a big sunburn and I missed my Tuesday night bike race. Thanks, Volkswagen!
When we bought the New Beetle about a year ago, the driver's side fog lamp had a cracked lens:
For her birthday, The Lovely One wished for it to be replaced with a new lens. Therein lies a tale.
Step 1: remove front wheels and headlights
The lens is not available separately from the entire fog lamp assembly. It's a small unit that sits in the low-mounted grille, under the bumper. The bulb is easily changed with no difficulty, but the assembly is attached to the grille with three Phillips-head screws.
The New Beetle is a tightly packaged car. In various places around the vehicle, you'll find packaging decisions that to my mind indicate either an engineering team that surrendered to the constraints of squeezing everything into this car's odd shapes and spaces, or one that was simply rushed by a rather quick development schedule. It cannot have helped that the New Beetle is an adaptation of the VW Golf platform, which means that the car is in some ways an attempt to put a round shape over a formerly boxy car.
The two screws on on the top side of the light are blocked by the bumper structure: they cannot be accessed from above. I don't think they can be accessed from the back, either. Let us consult Mr. Haynes: hm. All we have to do is remove the front clip to access those screws. What is this front clip they speak of?
Step 2: unplug turn signal and fog light connectors, then remove front clip
It's every piece of bodywork in front of the windshield, except for the hood. And the hood will block some of the screws, too.
A quick web search confirms that indeed, that's the normal procedure on a 1998 New Beetle. The standard Volkswagen shop schedule is 3 hours for this job.
Technically, only the bumper cover (which on the Beetle is a single piece of plastic bodywork covering the entire nose of the car: everything below the hood and between the fenders) needs to be removed, but it is attached to the two fenders by screws that are nearly as blocked as the fog lamp screws. With some patience and a few special tools, you might be able to release it without removing the fenders, but I wouldn't bet on it, and the Haynes manual doesn't recommend it.
Getting to all of the bolts holding the fenders in place requires you to first remove the front wheel, and then the inner fender liner, another piece of plastic held on by about ten screws.
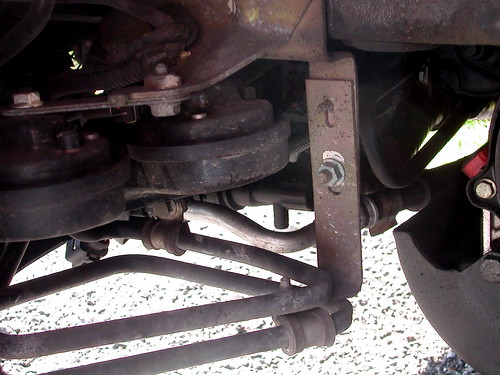
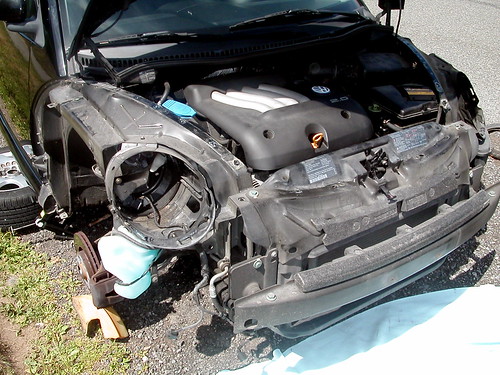
With the fender liner removed, you can get some idea of what I meant by tightly packaged:
This is the area in the front left corner of the car, just below the headlight.
Another view. Volkswagen has managed to tuck the fresh air intake, the horns, and some coils of rigid hydraulic tubing (brake lines? Oil lines?) into this corner of the car.
Once you remove the screws and bolts attaching the fender from the inside of the fenderwell (and don't forget the piece of load-bearing foam rubber tucked inside the fender) you get to deal with this little row of screws on the top side. You're not out of the woods yet, oh no: one or two of those screws near the windshield will be inaccessible via a normal screwdriver because the hood blocks the way. This is one of the places I had to switch to a bit held in a 1/4" socket in my ratchet driver, but at one point that was too tall, and I had to use a bit held in the jaws of my adjustable wrench. That was just stupid. Pay no attention to the warning on the battery cover, by the way: that's just the dealership trying to scare you away from plugging into the OBD-II/VAG-COM port or something.Don't forget to remove the headlights, too. And you have to do this whole procedure (wheels, fender liners, headlights, fender bolts) on both sides of the car.
This is a little bit less than all the bolts from one side of the car. So the total number of bolts removed and replaced was about twice this. My little Skil driver (thanks, Mom & Dad!) held up through it all. Good tool.
With TLO's help, the front clip was gently removed, allowing for the kind of spontaneous cute-dog shot you only get one chance to take:
Step 3: undo three screws holding old fog lamp assembly to grille, replace with new one
See? It's easy!
Here's a shot of where the fog light was:
I've put some notes on the flickr photo that might give you an idea of what's going on here.
At this point, you have a new fog light in the right place in the grille, and your car looks like this:
Time for a much-needed drink break. Because, you know, this is the halfway point of the job.As the saying goes, installation is the reverse of removal. There were some exciting moments while I tried to reinstall the passenger-side headlight, but I think I broke much less structural plastic on this project than I usually break.
And thanks to this repair running on so long, I got a big sunburn and I missed my Tuesday night bike race. Thanks, Volkswagen!
Comments:
Post a Comment
![]()
