
Tuesday, May 22, 2007
How to respace bicycle frames
Today's vital new skill for you to learn is frame respacing. You do this to bike frames because, for one reason or another, frames come with a lot of different widths between the rear dropouts, and rear wheels come a lot of different widths too. Go read Sheldon's article on this; indeed, much of what you see here is a mere restatement of his superb primer.
But since I seem to not post here much, I thought I might as well do a bit of show and tell. Rather than restate Sheldon Brown's guide, I'll just tell you what I did. Assuming you've read the article above, this will all make sense, and show you a real-world example.
0) NEVER RESPACE AN ALUMINUM OR CARBON FRAME. They don't respace nicely. Ti should be doable, but I know little about messing with that material. Classically, you'll be doing this to an old steel frame, and you will probably do it to take the frame from something like 120 or 126 mm spacing to the modern road standard of 130 mm. That's what the goal is in this frame job I did today.
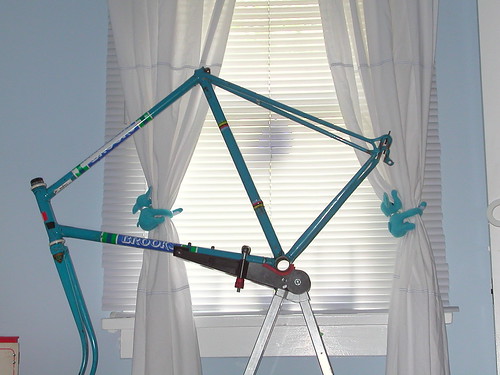
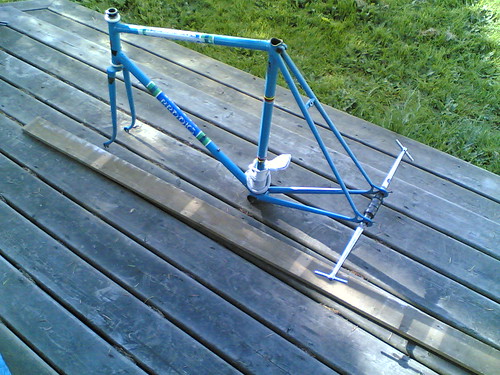
1) take some initial measurements to know where you're going. In this case, the bike in question is a Brooks frame previously owned by my friend Peter. He raced this frame in the 1970s. Brooks was one of the many small-time frame makers of the era: he worked in Ontario, made a few frames, and like many of his ilk, apparently found something more lucrative to do with his life. This is a typical top-of-the-line frame of the era: Reynolds 531 tubes and fork, Campagnolo dropouts, and nice but unadorned lugs. A top frame from another builder might substitute a different set of lugs, maybe Columbus or Vitus' best tubes instead of Reynolds, and possibly another brand of dropouts, but this is indisputably a world-class racing frame of its day. Eddy would have ridden no better a bicycle.
This particular example shows typical wear and paint chips for a frame that has spent more than 25 years in regular service. You could restore it, but possibly excepting unique (or nearly so) artifacts, my inclination is always to use a tool, not mount it on the wall. So when Dave (the current caretaker of the frame) asked me to modernize it, I was glad to take on the task.
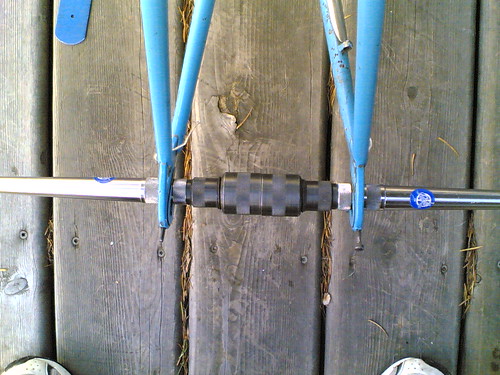
This frame measured out at 118 mm between the dropouts, which means it was actually a little narrower than the 120 mm spec it would have been built to. I also took some frame alignment numbers using a bit of string. The measures (these aren't really comparable to other frames in most cases; you just use them to establish relative differences) were 47 mm and 42 mm on either side of the seat tube. That's a pretty big difference.
2) bend some frame. I use a long piece of wood (and a sock to protect the frame) for this job, but I ended up doing most of the bending with my bare hands and shod feet. The technique is to stand on one dropout and pull the other side of the rear triangle upwards. Flip frame, repeat, until everything is in the right place.
3) align frame and dropouts. I did a pretty bad job of aligning the frame. It's about as bad as when I started. The dropouts are straight, though.
But since I seem to not post here much, I thought I might as well do a bit of show and tell. Rather than restate Sheldon Brown's guide, I'll just tell you what I did. Assuming you've read the article above, this will all make sense, and show you a real-world example.
0) NEVER RESPACE AN ALUMINUM OR CARBON FRAME. They don't respace nicely. Ti should be doable, but I know little about messing with that material. Classically, you'll be doing this to an old steel frame, and you will probably do it to take the frame from something like 120 or 126 mm spacing to the modern road standard of 130 mm. That's what the goal is in this frame job I did today.
1) take some initial measurements to know where you're going. In this case, the bike in question is a Brooks frame previously owned by my friend Peter. He raced this frame in the 1970s. Brooks was one of the many small-time frame makers of the era: he worked in Ontario, made a few frames, and like many of his ilk, apparently found something more lucrative to do with his life. This is a typical top-of-the-line frame of the era: Reynolds 531 tubes and fork, Campagnolo dropouts, and nice but unadorned lugs. A top frame from another builder might substitute a different set of lugs, maybe Columbus or Vitus' best tubes instead of Reynolds, and possibly another brand of dropouts, but this is indisputably a world-class racing frame of its day. Eddy would have ridden no better a bicycle.
This particular example shows typical wear and paint chips for a frame that has spent more than 25 years in regular service. You could restore it, but possibly excepting unique (or nearly so) artifacts, my inclination is always to use a tool, not mount it on the wall. So when Dave (the current caretaker of the frame) asked me to modernize it, I was glad to take on the task.
This frame measured out at 118 mm between the dropouts, which means it was actually a little narrower than the 120 mm spec it would have been built to. I also took some frame alignment numbers using a bit of string. The measures (these aren't really comparable to other frames in most cases; you just use them to establish relative differences) were 47 mm and 42 mm on either side of the seat tube. That's a pretty big difference.
2) bend some frame. I use a long piece of wood (and a sock to protect the frame) for this job, but I ended up doing most of the bending with my bare hands and shod feet. The technique is to stand on one dropout and pull the other side of the rear triangle upwards. Flip frame, repeat, until everything is in the right place.
3) align frame and dropouts. I did a pretty bad job of aligning the frame. It's about as bad as when I started. The dropouts are straight, though.
Comments:
Post a Comment
![]()
